Serverless Computing with AWS Lambda In C#

Serverless computing allows us to write and run our code in the cloud without necessarily bothering about infrastructure-related concerns: hosting, scaling, etc.
AWS Lambda is an AWS service offering serverless computing possibilities. With AWS Lambda, developers can focus on writing code instead of managing infrastructure. In addition, Lambda supports C# as one of its programming languages, providing developers with a powerful and familiar toolset to build serverless applications on AWS.
In this article, we will be exploring working with AWS lambda in C# .NET.
This article is a sequel to Asynchronous Communication In Microservices Via C# and AWS SQS, in which we built our Order processing service. We would be building on the code that we established there.
Our architecture would look like this:

Firstly, some valuable terms in AWS Lambda:
AWS Lambda: The core service lets you run code without provisioning or managing servers. You upload your code, and AWS Lambda automatically scales and manages your infrastructure.
Function: A piece of code that you deploy to AWS Lambda. Various AWS services or events can trigger it.
Trigger: An event source that invokes a Lambda function. Common triggers include AWS services like S3, API Gateway, CloudWatch Events, and more.
Event: The input that triggers a Lambda function. Events can be of various types, such as an S3 object creation, an HTTP request, or a timer-based CloudWatch Event.
Runtime: The environment in which your Lambda function code runs. AWS Lambda supports various runtimes like Node.js, Python, Java, Go, and more.
Handler: The specific function within your Lambda code that is executed when the function is triggered. It's defined in the format
filename.handlerwherefilenameis your code's filename andhandleris the function name.
Let's get started writing some code!
Firstly, create an AWS account and sign in to it on your computer via the console/terminal.
Install the AWS lambda CLI extension for
dotnet. Type in the below command to install it globally.dotnet tool install --global Amazon.Lambda.ToolsInstall Lambda templates for
.NET. This will allow us to create various lambda projects from our IDE.dotnet new --install "Amazon.Lambda.Templates"Now, when you attempt to create a new project, you'll see some AWS lambda-related templates
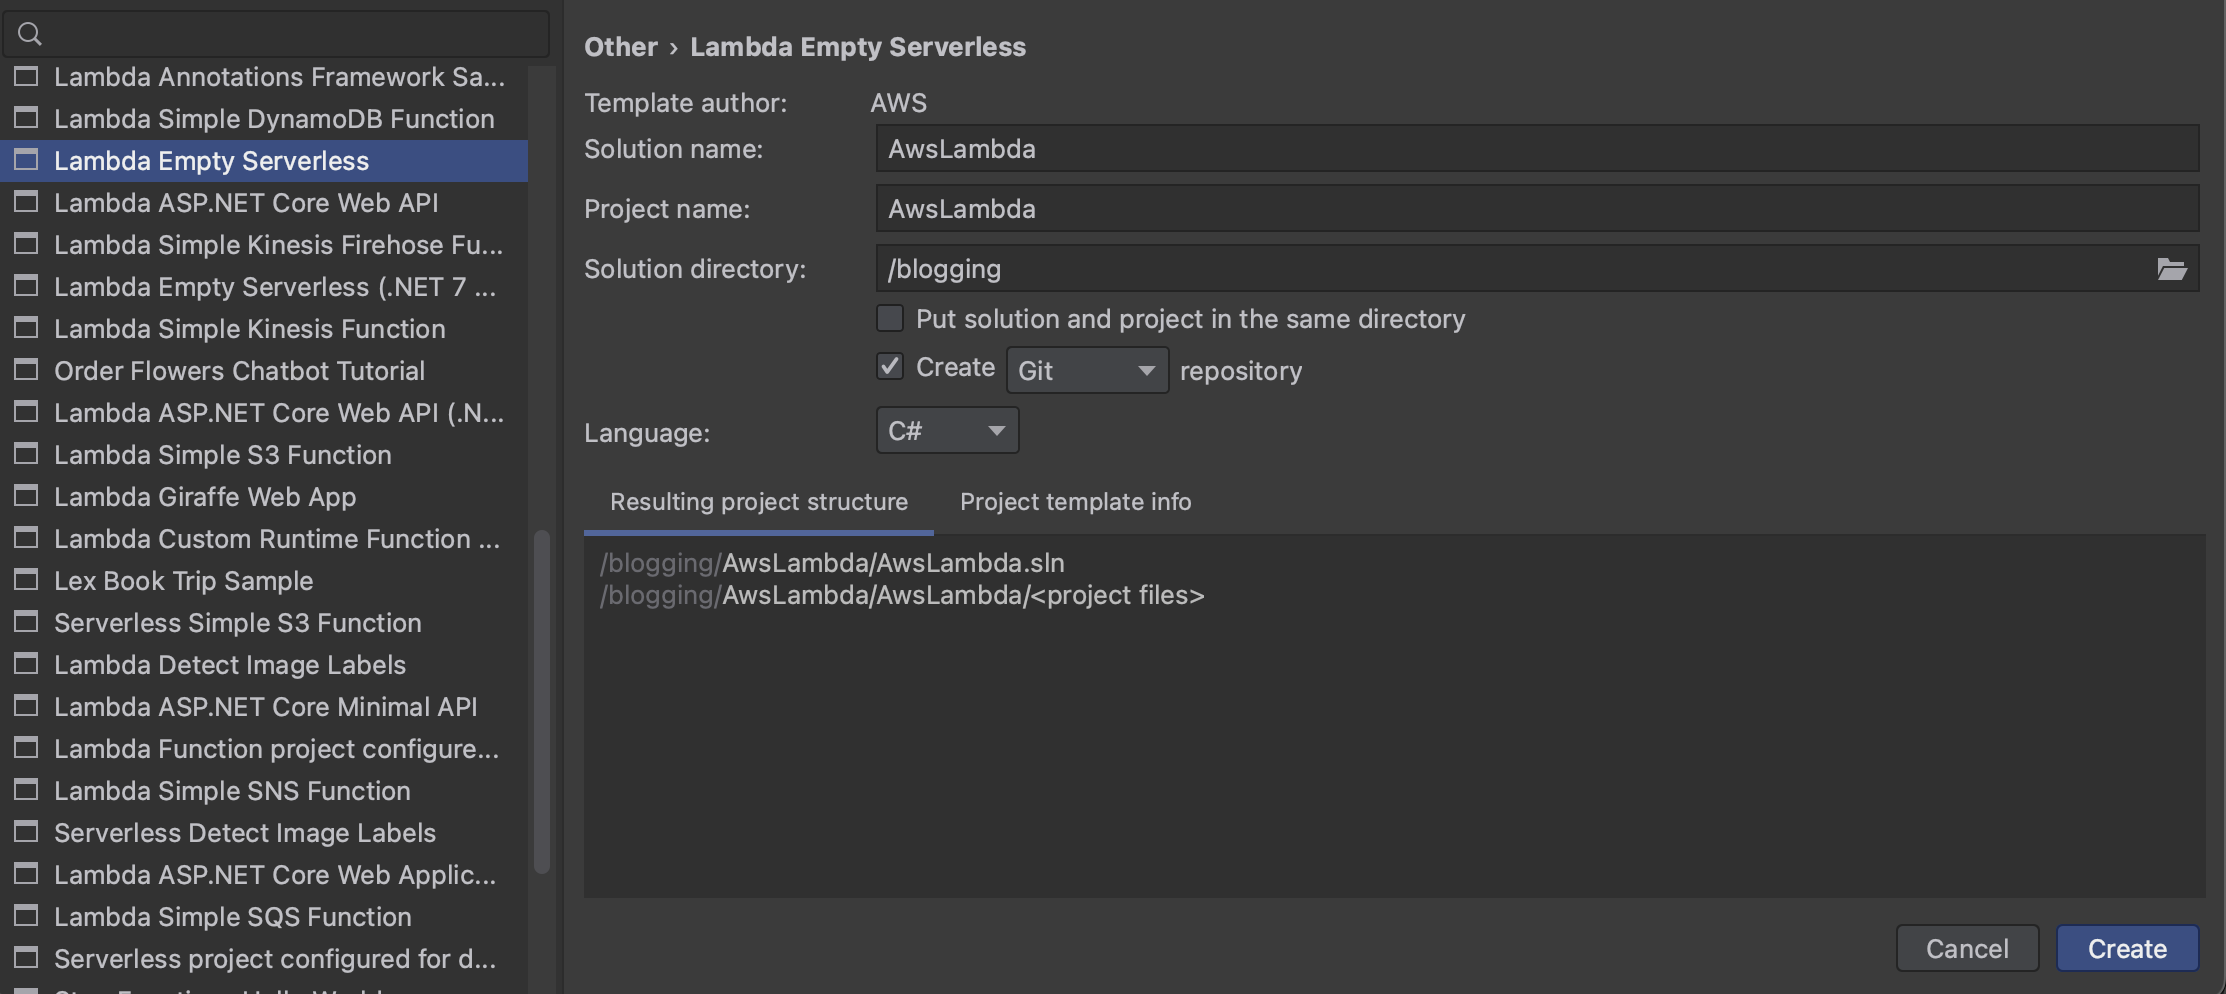
Create a new Project with the Lambda

Implement the notifications service in the
ProcessMessageAsyncmethod.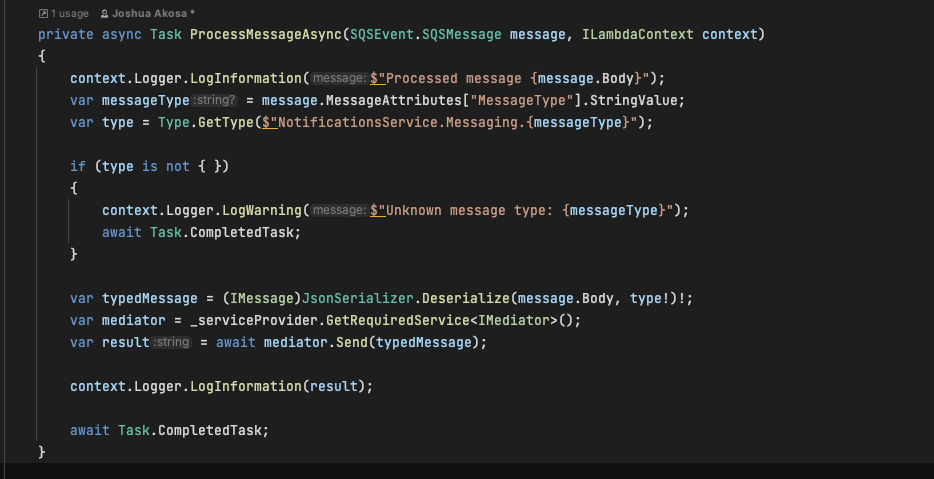
Deploy our just-created lambda project to AWS. Navigate to the new project's directory, open the terminal, and enter the following command.
dotnet lambda deploy-function NotificationServiceCreate or select an appropriate IAM role for your Lambda

Go to the Lambda dashboard on the AWS console.
Confirm the presence of your just deployed Lambda

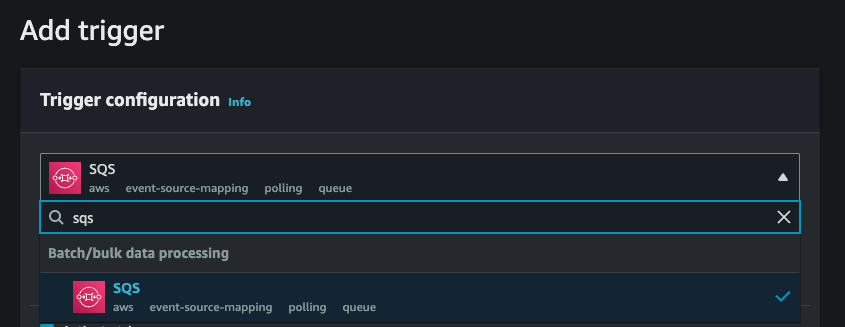
Now, let's configure the trigger for our deployed Lambda
Open your newly created Lambda on the dashboard and click "Add trigger."

Select SQS as the trigger
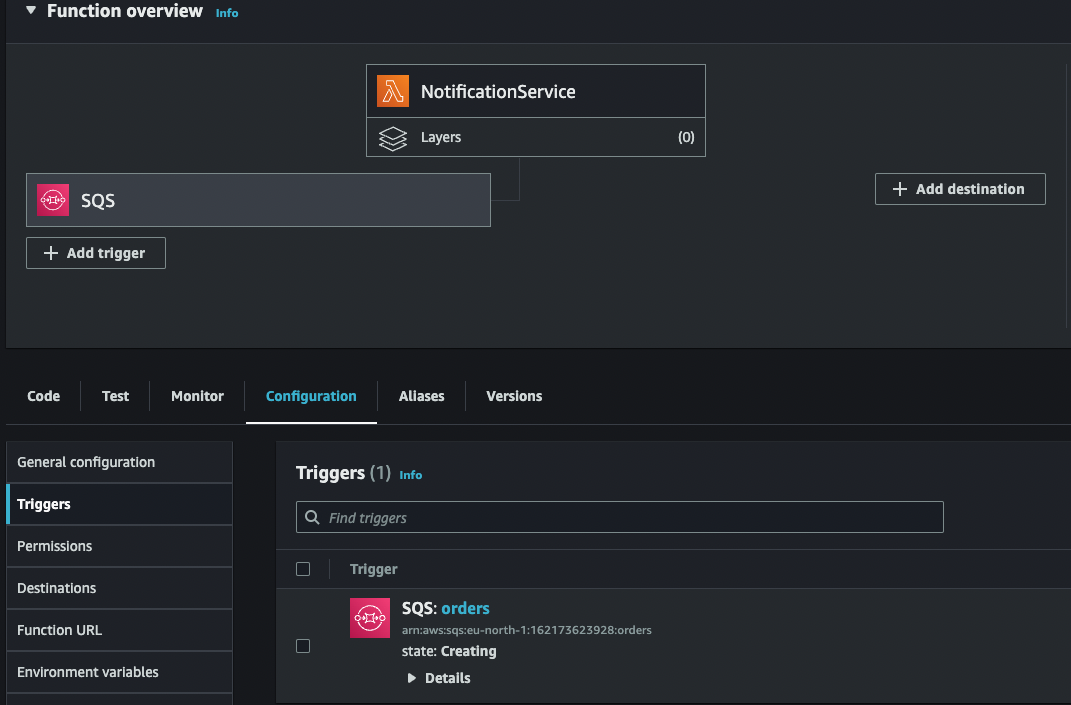
Add your SQS queue. In our case, this is the
ordersqueue.
Save your changes. Your Lambda should look like this
And that's it! Now, let's test the whole flow.
To test the integration:
Publish some messages to our queue via the
Orders.Api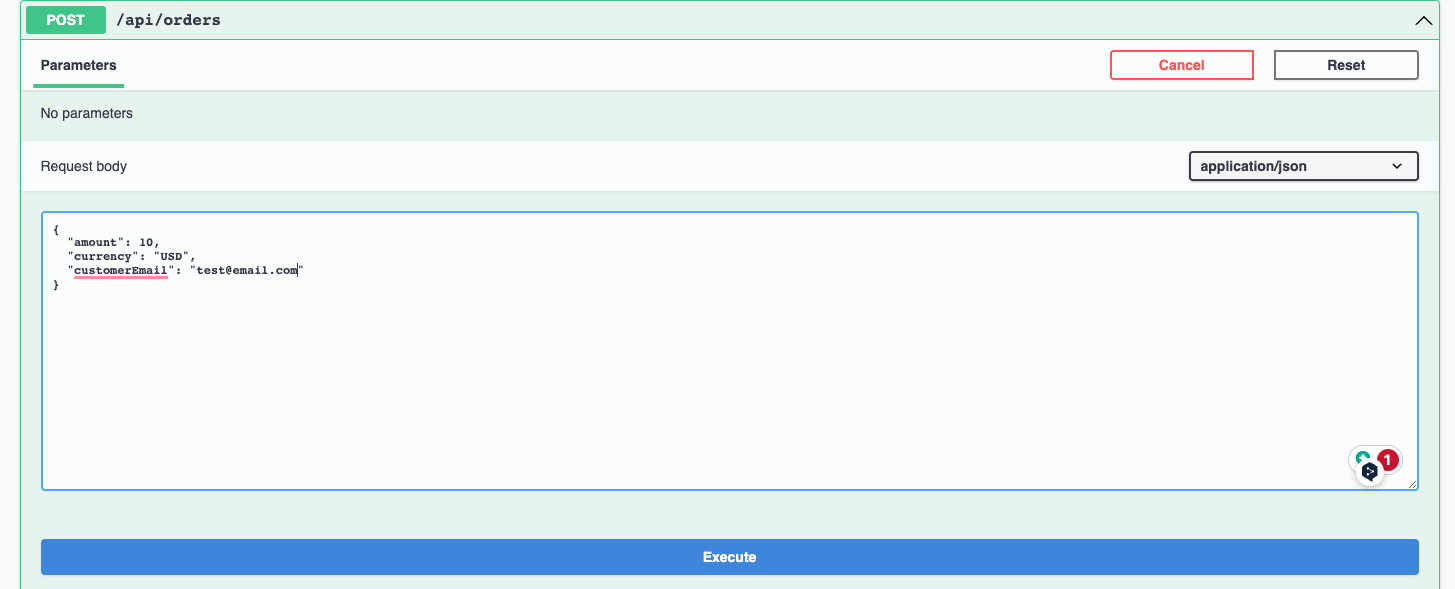
Verify the messages were published in the
SQSdashboard
Verify via the logs that our messages have been appropriately handled

The code for this article is available here.