The Crucial Role of Containerization in Distributed Systems
Containerization with Docker in a .NET microservice
In recent years, microservices architecture has emerged as a dominant paradigm for building scalable and resilient software systems. This approach decomposes large, monolithic applications into smaller, loosely coupled services that can be developed, deployed, and managed independently. While the benefits of microservices are well-documented – such as improved agility, scalability, and fault isolation – the effective deployment and management of these services present unique challenges. Containerization has become a cornerstone technology in addressing these challenges and helping to unlock the full potential of microservices architecture.
Understanding Microservices Architecture
Microservices architecture breaks down complex applications into smaller, independently deployable services, each responsible for a specific business function. These services communicate with each other via well-defined APIs, often over lightweight protocols such as HTTP or messaging queues. This approach enables teams to develop, test, and deploy services independently, fostering greater agility and scalability.
Challenges in Microservices Deployment
While microservices offer numerous advantages, they introduce complexities in deployment and management:
Service Dependencies: Microservices rely on different runtime environments, libraries, and dependencies. Managing these dependencies across various environments can be challenging, leading to compatibility issues and deployment failures.
Scalability and Compute Resource Utilization: Each microservice may have different resource requirements and scaling characteristics. Efficiently allocating resources and scaling individual services to meet demand while minimizing waste requires careful orchestration.
Consistent Deployment: Ensuring consistent deployment environments across development, testing, and production stages is crucial for reliable and predictable deployments. Any deviation in the environment can lead to unexpected behavior and failures.
Containerization
Containerization addresses these challenges by encapsulating applications and their dependencies into lightweight, portable units called containers. Each container includes everything needed to run the application, including code, runtime, system tools, libraries, and settings. Key benefits of containerization in the context of microservices include:
Consistency: Containers ensure consistent runtime environments across different stages of the development lifecycle, from local development to production deployment. Developers can package their applications with all dependencies, ensuring they run consistently regardless of the underlying infrastructure.
Isolation: Containers provide process and resource isolation, allowing microservices to run independently without interfering with each other. This isolation improves fault tolerance and resilience, as failures in one service are less likely to impact others.
Portability: Containers are platform-agnostic and can run consistently across different environments, including on-premises data centers, public clouds, and hybrid environments. This portability enables organizations to adopt multi-cloud strategies and facilitates seamless deployment across diverse infrastructures.
Scalability: Container orchestration platforms like Kubernetes simplify the management and scaling of containerized microservices. They provide automated scaling based on resource utilization and traffic patterns, ensuring optimal performance and resource utilization.
Docker
Docker is a platform that enables developers to develop, ship, and run applications in containers. Docker provides tools and workflows for building, distributing, and running containers efficiently. Key components of Docker include:
Docker Engine: The core component of Docker that allows you to create and manage containers on a host system.
Docker Image: A read-only template that contains the application code, runtime, libraries, and dependencies needed to run a containerized application.
Dockerfile: A text file that contains instructions for building a Docker image. It specifies the base image, environment variables, dependencies, and commands to create the image.
Docker Registry: A repository for storing and sharing Docker images. The Docker Hub is a public registry maintained by Docker, but organizations can also set up private registries for their own images.
Implementation
Create a new
web APIapplication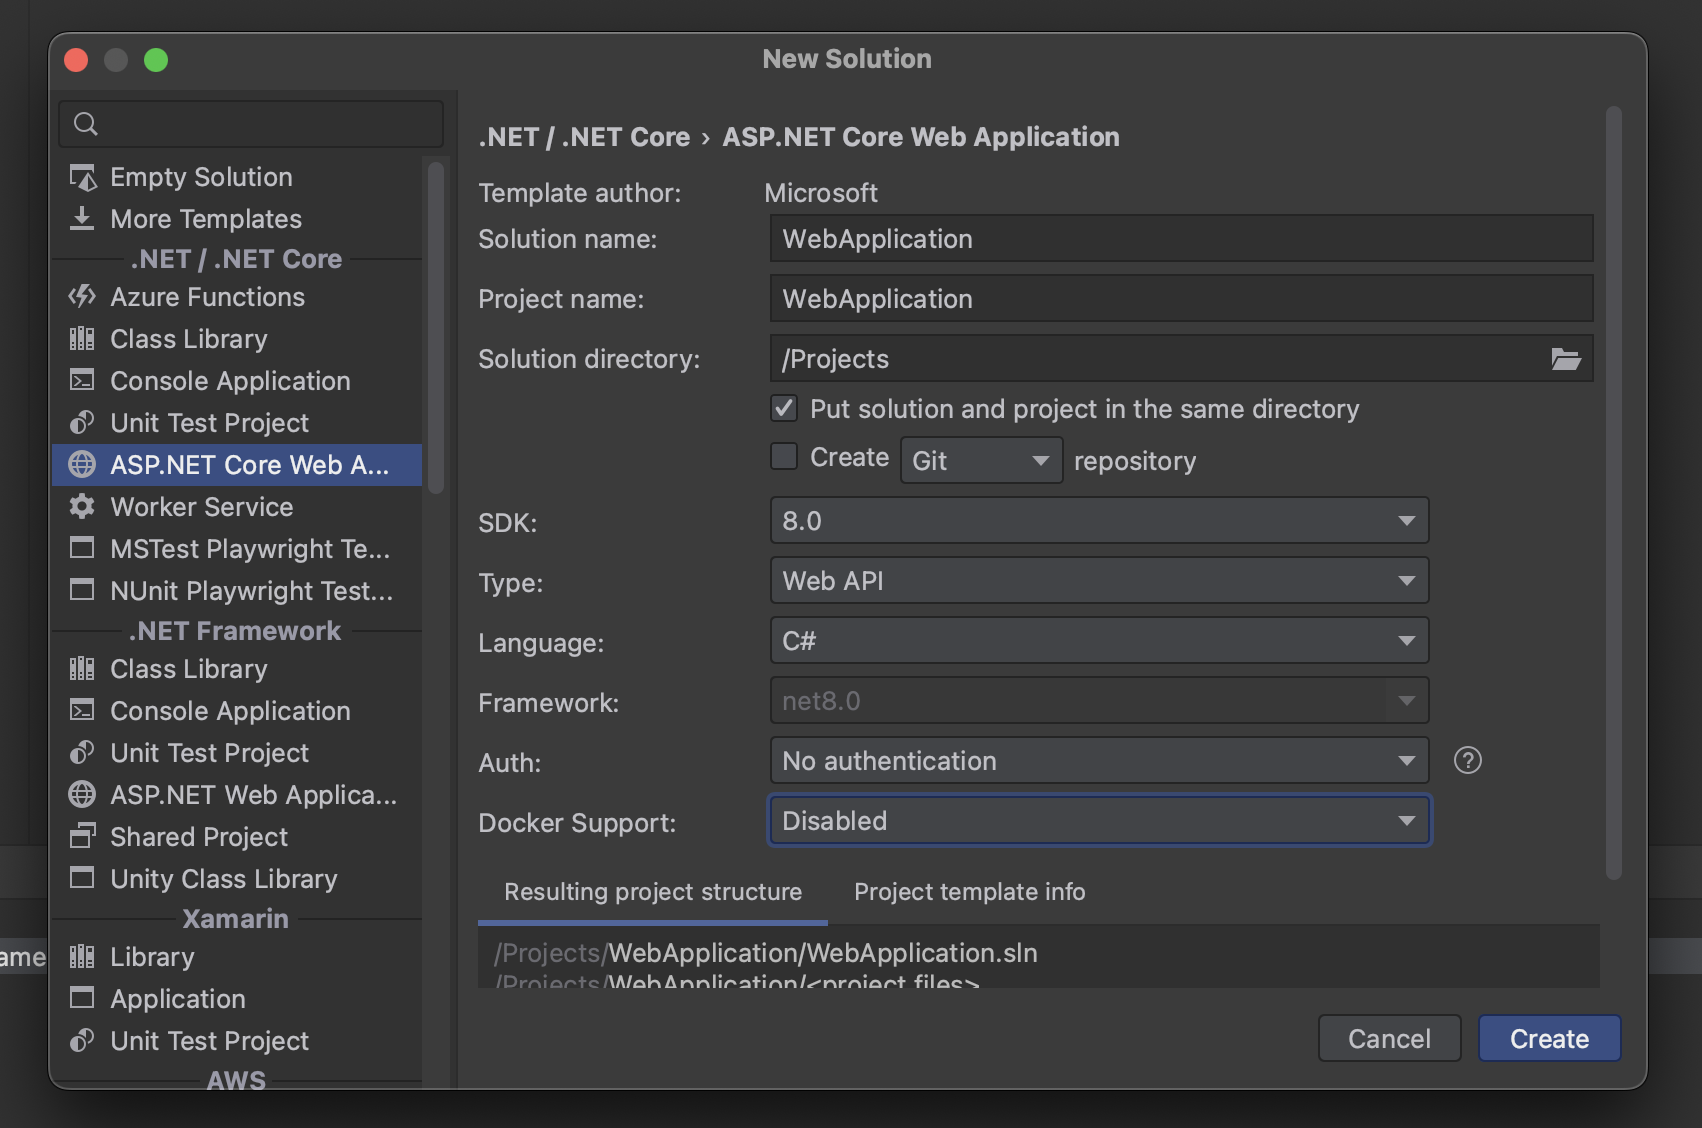
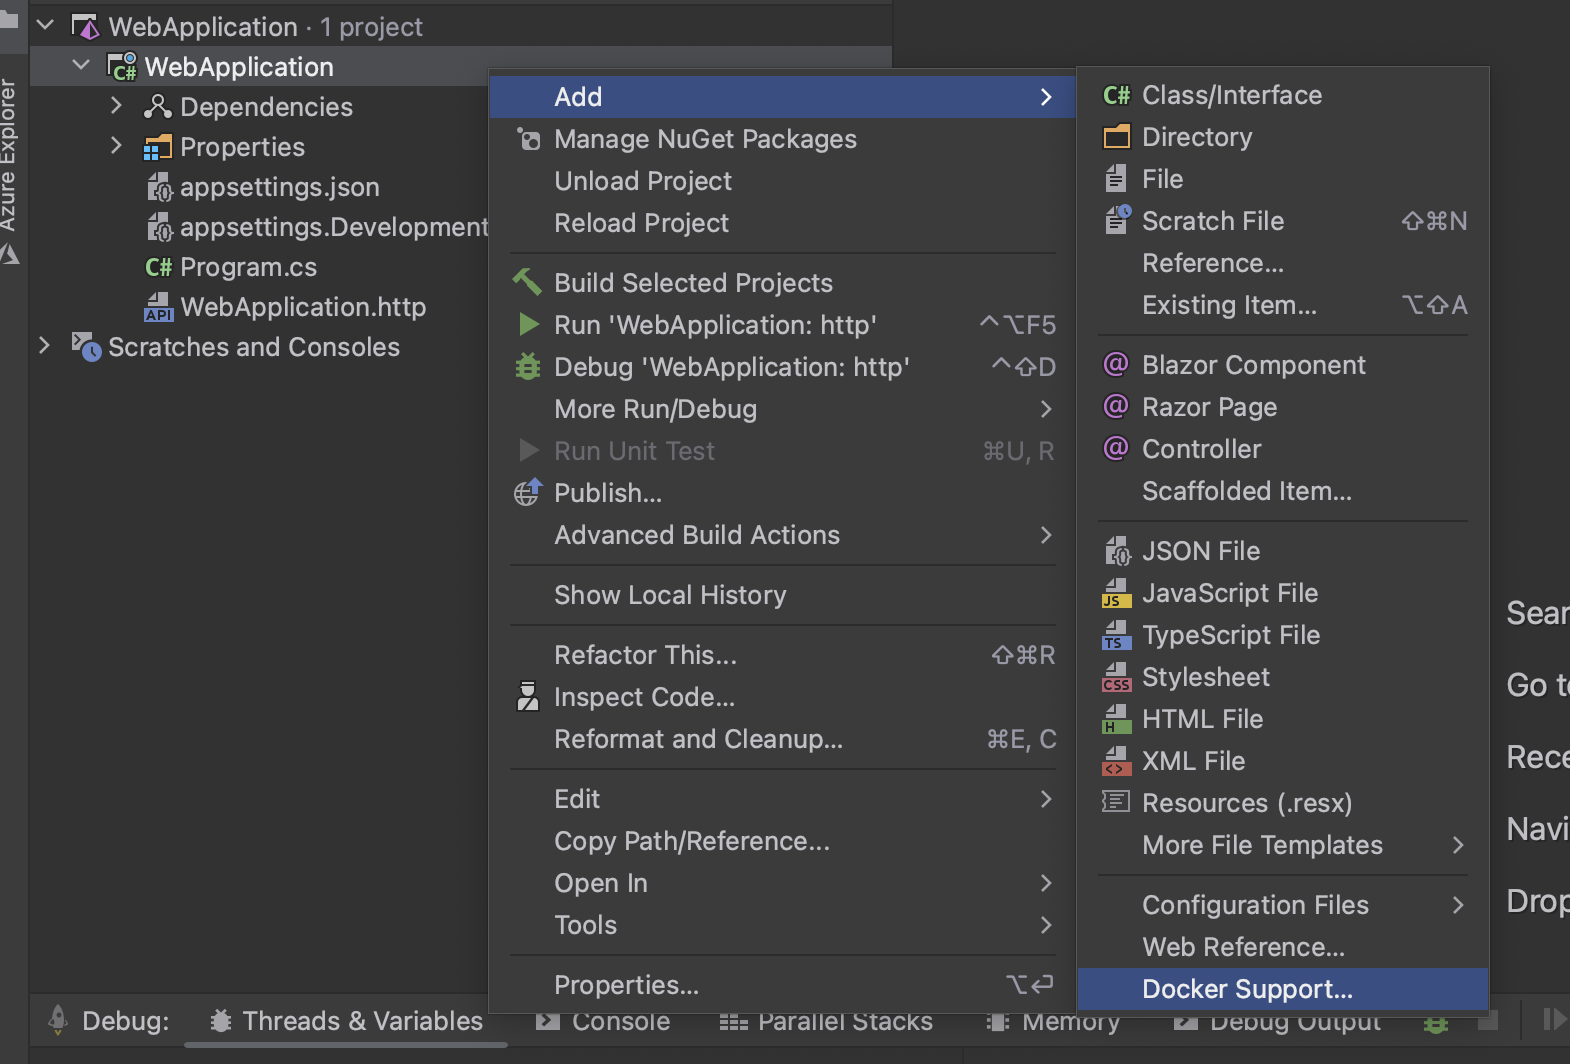
Create
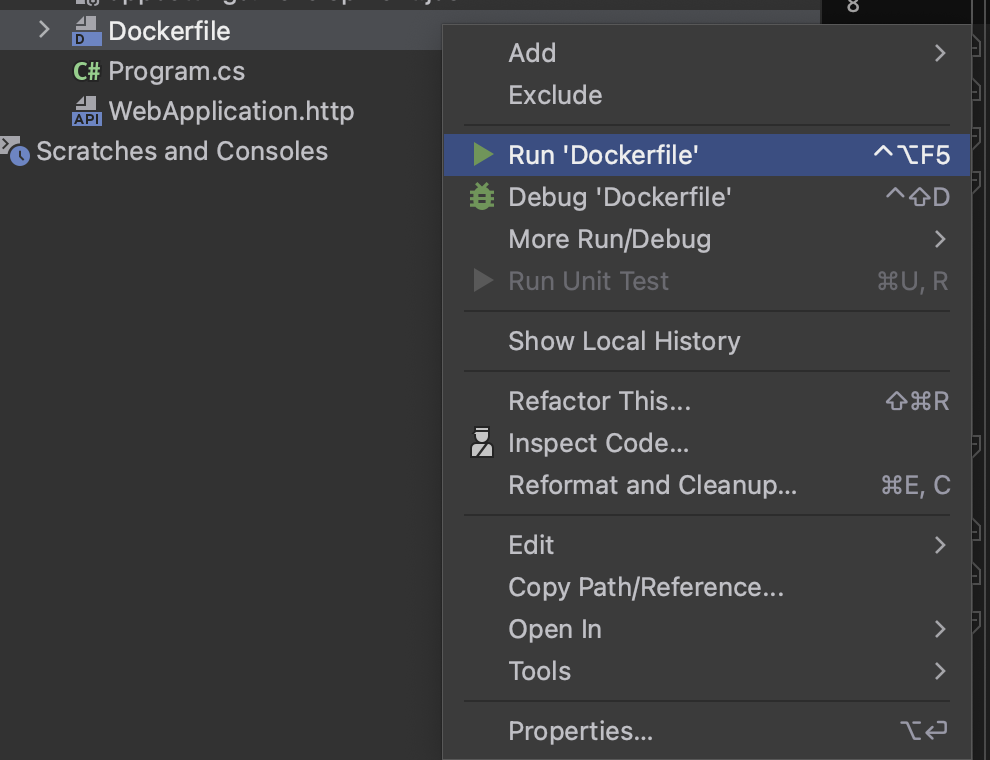
dockerfileThis can be done manually or via your favorite IDE. Most IDEs like Rider and Visual Studio offer the possibility to create a docker file from within the application. We would be doing this from Rider. Right-click on the project and select Add docker support. (The wordings might be different in other IDEs.)
This is our generated docker file:
 FROM mcr.microsoft.com/dotnet/aspnet:8.0 AS base
 WORKDIR /app
 EXPOSE 80
 EXPOSE 443

 FROM mcr.microsoft.com/dotnet/sdk:8.0 AS build
 WORKDIR /src
 COPY ["WebApplication.csproj", "./"]
 RUN dotnet restore "WebApplication.csproj"
 COPY . .
 WORKDIR "/src/"
 RUN dotnet build "WebApplication.csproj" -c Release -o /app/build

 FROM build AS publish
 RUN dotnet publish "WebApplication.csproj" -c Release -o /app/publish

 FROM base AS final
 WORKDIR /app
 COPY --from=publish /app/publish .
 ENTRYPOINT ["dotnet", "WebApplication.dll"]
Let's break it down step by step:
FROMmcr.microsoft.com/dotnet/aspnet:8.0AS base: This line specifies the base image for the application. It's using the ASP.NET runtime image for .NET 8.0 as the base. This image contains the necessary components to run ASP.NET applications.WORKDIR /app: This sets the working directory inside the container to/app. All subsequent instructions will be executed relative to this directory.EXPOSE 80andEXPOSE 443: These lines expose ports 80 and 443, which are commonly used for HTTP and HTTPS traffic in web applications.FROMmcr.microsoft.com/dotnet/sdk:8.0AS build: This line sets up another stage of the Dockerfile, using the .NET SDK 8.0 image. This stage will be used for building the application.WORKDIR /src: This changes the working directory to/srcwithin the container.COPY ["WebApplication.csproj", "./"]: This copies the project file (WebApplication.csproj) into the/srcdirectory.RUN dotnet restore "WebApplication.csproj": This runsdotnet restoreto restore the dependencies of the project.COPY . .: This copies the entire content of the current directory (presumably where the Dockerfile is located) into the/srcdirectory of the container.WORKDIR "/src/": This changes the working directory to/srcwithin the container.RUN dotnet build "WebApplication.csproj" -c Release -o /app/build: This command builds the .NET project in Release mode and places the output in the/app/builddirectory.FROM build AS publish: This line creates another stage namedpublishbased on the previous build stage. This stage will be used for publishing the application.RUN dotnet publish "WebApplication.csproj" -c Release -o /app/publish: This command publishes the application, generating the final output in the/app/publishdirectory.FROM base AS final: This line creates the final stage based on thebasestage, which contains the ASP.NET runtime.WORKDIR /app: This changes the working directory to/appwithin the container.COPY --from=publish /app/publish .: This copies the published output from thepublishstage into the current directory of the final stage.ENTRYPOINT ["dotnet", "WebApplication.dll"]: This sets the entry point for the container. It specifies that when the container starts, it should run theWebApplication.dllusing thedotnetcommand.
Start the app
You can start the app using the command line or from the IDE.
To build from the console, run the following command:
docker build -t dotnet-app .docker run -d -p 8080:80 dotnet-app
To start it from the IDE, select and run the dockerfile or simply run the project by pressing f5, depending on your chosen IDE. Under the hood, this will build and run the image using the above-mentioned commands.
Verify our app is running.
View the running containers by typing
docker ps(you can also do this via the docker desktop client.)
Navigate to the swagger URL (http://localhost:8080/swagger/index.html) of the app to confirm it is running.
The source code for this tutorial is available here.
Conclusion
In the era of microservices architecture, containerization has emerged as a foundational technology for building, deploying, and managing distributed applications. Encapsulating applications and their dependencies into portable and self-contained units and containers address the complexities inherent in the deployment of microservices. They provide consistency, isolation, portability, and scalability, enabling organizations to unlock the full potential of microservices architecture and deliver agile, scalable, and resilient software solutions. As organizations continue to embrace microservices architecture, containerization will remain a critical enabler of modern software development practices.